Stopping condensation in a metal building comes down to three controls: keep moist air moving with ventilation or dehumidification, raise interior surface temperatures with insulation, and manage vapor movement with correctly placed, sealed vapor retarders. Get those three right and sweating walls, dripping ceilings, and rusted fasteners become rare. Skip one, and the other two can’t compensate.
TL;DR:
- ASHRAE recommends keeping indoor dew point below 60°F during unoccupied hours to limit mold and dampness; use it instead of relative humidity alone.
- Buildings with livestock, heavy occupancy, or wet work may need mechanical ventilation or an exhaust fan triggered by a humidity sensor.
- In cold and mixed climates, place the retarder on the insulation’s interior side; use 0.10 perm or lower normally, and about 0.02 for livestock.
- Existing buildings should be checked for leaks and moisture sources, then ventilation and gaps fixed before insulation is added, preventing upgrades from concealing wet assemblies.
- Size ventilation at roughly one square foot of free vent area per 150 square feet of roof space, divided evenly between intake and exhaust.
Table of Contents
- Why Metal Buildings Condense: Dew Point, Surface Temperature, and Hidden Moisture
- Diagnosing the Common Causes of Condensation
- Practical Prevention: Ventilation, Insulation, Vapor Control, and Maintenance
- Step-by-Step Retrofit Plan for Existing Metal Buildings
- Choosing Materials and Specifying Installation Correctly
- Our Approach to Condensation Prevention and Retrofit Work
- When to Handle It Yourself and When to Call a Professional
- Turnkey Builds and Retrofits That Reduce Condensation Risk
- FAQ
- Sources
Why Metal Buildings Condense: Dew Point, Surface Temperature, and Hidden Moisture
Condensation happens when air holding moisture touches a surface colder than its dew point, the temperature at which water vapor turns back into liquid. Metal conducts heat fast, so roof panels, purlins, and wall sheeting swing close to outdoor temperature overnight, often sitting well below the dew point of warmer indoor air. ASHRAE treats dew-point temperature, not relative humidity alone, as the more reliable indicator of condensation risk and recommends keeping it below 60°F during unoccupied hours to limit mold and dampness.
Condensation shows up in two forms with different stakes:
- Visible condensation beads on interior roof and wall panels, dripping onto vehicles, tools, or livestock below.
- Concealed condensation forms inside wall or roof cavities, soaking insulation and corroding fasteners without any outward sign until damage is advanced.
Dew point below 60°F during unoccupied hours is the benchmark ASHRAE ties to limiting mold and dampness risk, and it’s a more useful trigger for action than watching a humidity percentage climb.
Diagnosing the Common Causes of Condensation
Most condensation problems trace back to one of three sources, and finding the right one determines whether you need a fan, a sealant gun, or an insulation retrofit.
- Internal moisture sources overload the air. Wet slabs curing, livestock respiration, drying paint, or stacks of damp firewood or hay all dump water vapor into the building’s air.
- Air leaks and pressure imbalances carry moisture to cold panels. Gaps at eaves, doors, and wall penetrations let warm, humid air infiltrate and settle against the coldest surfaces it can find.
- Thermal bridging creates cold spots. Purlins, girts, and uninsulated fasteners conduct heat straight through the wall or roof assembly, chilling that one spot enough to trigger condensation even when the rest of the panel stays dry.
MBMA’s condensation fact sheet frames this plainly: condensation occurs wherever warm, moisture-laden air meets a surface below its dew point, which is why the same building can stay dry in one bay and drip in another depending on airflow and insulation continuity.
Practical Prevention: Ventilation, Insulation, Vapor Control, and Maintenance
Ventilation is the first lever to pull, and the cheapest. Ridge vents paired with soffit or eave intake let warm, moist air escape before it ever contacts cold steel, and the intake-to-exhaust balance matters more than the size of either opening alone. In buildings with heavy occupancy loads, livestock, or frequent wet work, passive vents alone won’t keep up, and mechanical ventilation or an exhaust fan tied to a humidity or dew-point sensor becomes necessary.
Insulation works by raising interior surface temperatures above the dew point. Continuous insulation, laid across purlins and girts rather than only between them, avoids the cold bridging that cavity-only insulation leaves behind. MBMA lists correct insulation alongside ventilation and vapor retarders as the primary controls for condensation in metal buildings.
Vapor retarders slow moisture movement toward cold surfaces, but placement and perm rating both matter, and climate decides where the retarder belongs:
- Interior-side placement suits most cold and mixed climates, keeping indoor vapor from reaching cold steel.
- Sealed seams and taped penetrations matter as much as the retarder material itself; a punctured or gapped retarder concentrates moisture at the breach.
- Avoid stacking two impermeable layers, which can trap moisture inside the assembly with no way to dry.
Pro Tip: Track interior dew point, not just humidity percentage, and treat a reading above 60°F as your signal to run ventilation or dehumidification before condensation starts.
Routine maintenance closes the loop: keep ground moisture away from the slab perimeter, replace worn closure strips at the ridge and eave, and inspect vapor retarder seams yearly for tears or sagging. ASHRAE ‘s 60°F dew-point threshold works well as the trigger for scheduling that inspection.
Step-by-Step Retrofit Plan for Existing Metal Buildings
Retrofitting an existing building rewards a specific order of operations, because insulating over an undiagnosed leak or sealing air without first fixing moisture sources wastes money.
- Triage first. Inspect for roof and trim leaks, measure interior dew point over a few days, and check whether existing insulation or vapor retarder is torn, sagging, or wet.
- Fix ventilation and sealing before anything else. Clear blocked ridge and soffit vents, add a humidity-triggered exhaust fan if occupancy is heavy, and seal panel closures, trim, and wall penetrations.
- Add mechanical dehumidification where ventilation alone can’t keep dew point down, particularly in enclosed shops or buildings with livestock.
- Upgrade insulation and vapor control for longer-term protection. Continuous insulation with a correctly placed vapor retarder solves cold-bridging; closed-cell spray foam is worth considering where it can combine air-sealing and insulation in one step, as homeowner-facing retrofit guidance notes, though it carries a higher upfront cost.
- Reroof or add a rainscreen cavity only when panel damage or persistent concealed moisture makes patch fixes unreliable.
Our guide to insulation options walks through which of these upgrades fit a given budget and climate.
Choosing Materials and Specifying Installation Correctly
Perm rating, the measure of how much moisture vapor passes through a material, drives which retarder belongs in your assembly. Industry guidance recommends a vapor retarder rated at 0.10 perm or lower for normal-humidity buildings, tightening to roughly 0.02 perm for high-humidity uses like indoor livestock housing or wash bays, according to condensation control guidance published in Metal Construction News.
Insulation choice carries real trade-offs:
- Laminated fiberglass blanket is affordable and widely used but underperforms if compressed or gapped at seams.
- Multi-layer fiberglass systems improve continuity over single-layer blanket at added material cost.
- Rigid board resists compression and supports continuous coverage over purlins.
- Closed-cell spray foam air-seals and insulates in one application, useful where infiltration has been a chronic problem.
Vent sizing follows a rough rule of one square foot of free vent area per 150 square feet of attic or roof space, split evenly between intake and exhaust, with closure strips fitted tightly under the ridge cap to block wind-driven rain while still allowing airflow. Workmanship failures (unsealed seams, punctured retarders, insulation stuffed in as a closure strip) are a more common cause of retrofit failure than the choice of material itself, per the same Metal Construction News analysis.
Our Approach to Condensation Prevention and Retrofit Work
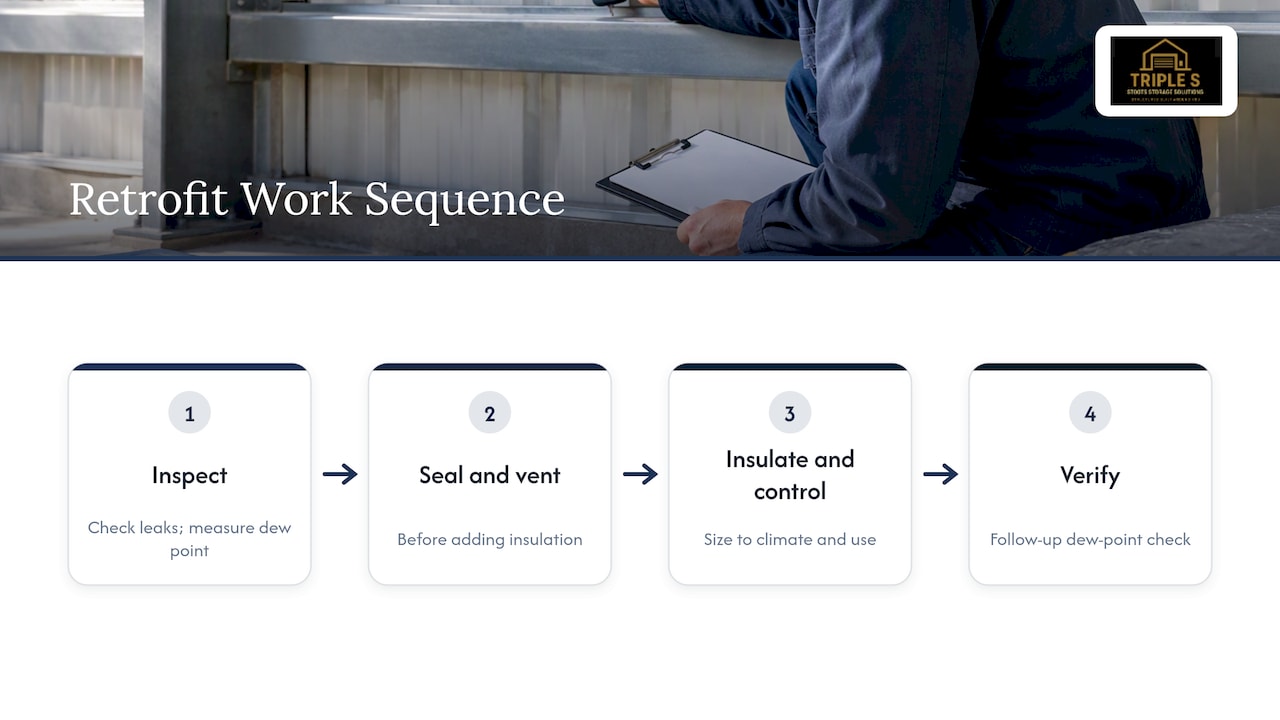
We work condensation problems in the same order every time: inspect the building for leaks and measure dew point, seal and vent before touching insulation, then add insulation and vapor control sized to the climate and use, and verify with a follow-up dew-point check after the work is done. That sequence avoids the common mistake of insulating over a leak or a vapor retarder that was never sealed.
Pro Tip: When you request a quote on condensation work, ask for the vapor retarder’s perm rating and placement, the insulation strategy by section (roof versus wall), the ventilation scope, and what’s covered under warranty. Our building care guide and sealing priority checklist cover the same sequence in more detail, and our project gallery shows finished insulated and vented builds.
— Stoots
When to Handle It Yourself and When to Call a Professional
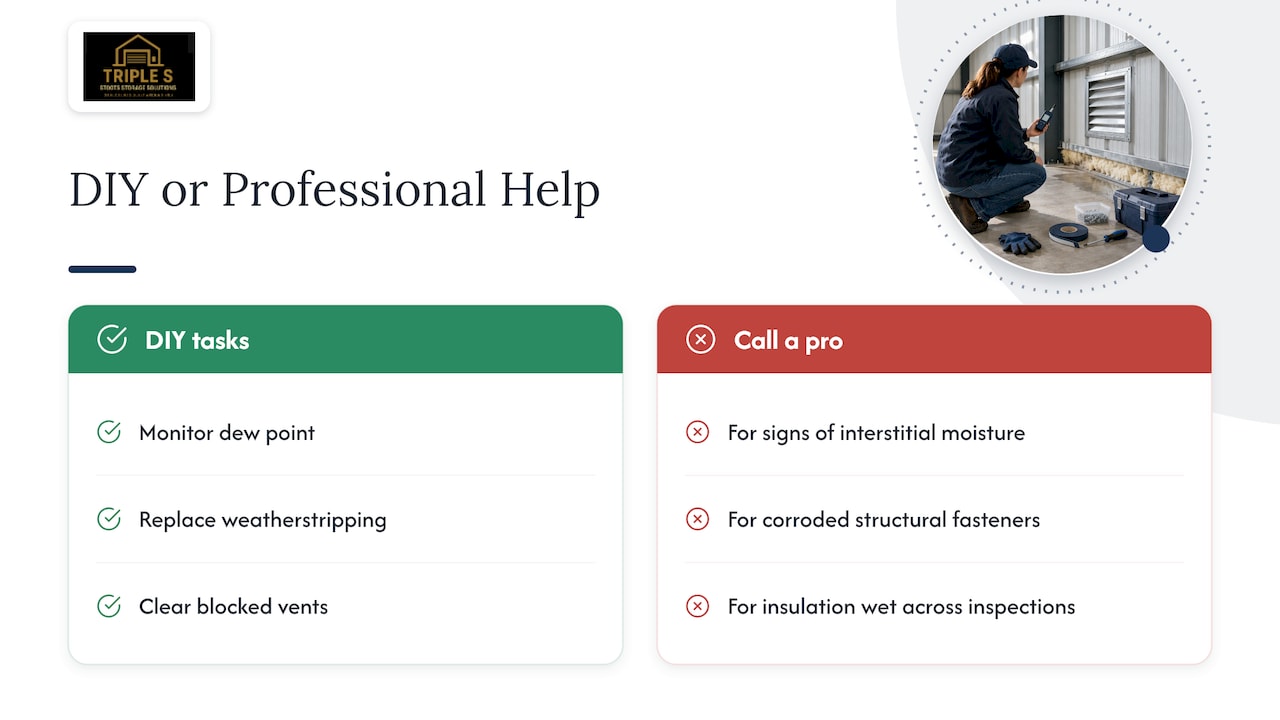
Monitoring dew point, replacing weatherstripping, and clearing blocked vents are safe homeowner tasks. Call a professional when you see signs of interstitial moisture, corroded structural fasteners, or insulation that stays wet across multiple inspections. A professional assessment typically includes a moisture inspection, dew-point logging over several days, and a retarder or insulation plan, with time and cost driven mainly by how much of the envelope needs to be opened up.
Turnkey Builds and Retrofits That Reduce Condensation Risk
If sealing and venting an older structure feels like chasing a moving target, a new build gives us control over every layer from the slab up. We handle concrete and foundation work, site prep, and full turnkey installation on garages, workshops, carports, and barns, specifying insulation and vapor retarder placement correctly the first time instead of patching around old mistakes.

When you request a quote, ask us for the vapor retarder type and perm rating, the insulation plan by section, and the ventilation scope, the same checklist that applies to any contractor. Browse our metal workshops and shop buildings or request a quote on a new build to get a straight answer before any deposit is due.
FAQ
How do I stop my metal shed from sweating?
Seal gaps around doors and penetrations first, then add ridge and soffit ventilation so moist air has somewhere to go. If sweating continues, check your interior dew point and consider adding insulation with a correctly placed vapor retarder.
How can I stop condensation on my metal garage roof?
Start by confirming the roof isn’t actually leaking, since trim and flashing gaps often mimic condensation. Once leaks are ruled out, improve ridge and eave ventilation and add continuous roof insulation to keep the panel’s interior surface above the dew point.
Do I need a vapor barrier in my metal building?
Most climates benefit from a vapor retarder placed on the interior side of the insulation, sealed tightly at seams and penetrations. MBMA lists correctly placed vapor retarders, ventilation, and insulation as the primary controls for condensation in metal buildings.
Why is there condensation in my metal shed?
Condensation forms when warm, moisture-laden air inside the shed touches steel surfaces colder than the air’s dew point, often from wet storage, drying materials, or poor airflow. Thermal bridging at purlins and fasteners can create extra-cold spots where condensation shows up first.
Sources
- ASHRAE position: Limiting indoor mold and dampness in buildings
- MBMA Condensation fact sheet
- Condensation control in metal building systems (Metal Construction News / CambridgeAir)
- Why your metal garage sweats and how to fix it (Handyman Connection)
Leave a Reply