
Yes, electricity in a metal garage is safe when you use approved wiring methods such as conduit or metal-clad cable, bond the metal shell and any metal raceways, run a four-wire feeder with neutral and ground kept separate at the subpanel, and pull the proper permits. Most workshops do best with a 100-amp subpanel, installed by a licensed electrician and backed by NEC and OSHA standards like those referenced by NFPA and OSHA. Builders prepare the structure; a licensed electrician makes the final connections.
TL;DR:
- Using approved conduit or armored cable with proper bonding and permits is essential to safely power a metal garage, with most setups using a 100-amp subpanel.
- Exposed Romex wiring is not suitable for outside runs on metal walls, which require conduit or armored cable to prevent physical damage and condensation issues.
- Metal raceways and panels must be effectively bonded and grounded, with separate grounding electrodes for detached structures, to prevent electrical faults and meet code standards.
- Planning for future load increases means sizing the subpanel at 100A, even if current needs are lower, to accommodate tools like welders or EV chargers.
- Installing proper moisture-resistant conduits, weatherproof enclosures, and sealed penetrations helps to withstand metal building conditions and prevent water intrusion.
Table of Contents
- Your planning checklist before you call an electrician
- Why Romex alone usually fails in a metal building
- Bonding the shell and grounding the subpanel correctly
- Why 100 amps is the default for most garage subpanels
- Choosing conduit and enclosures that survive metal-building conditions
- Dealing with weak Wi-Fi and cell signal inside a metal shell
- Permits, inspections, and what to leave to a licensed electrician
- Heating and ventilation circuits need their own planning
- Garage doors and openers carry their own electrical risks
- Outlet placement and spacing that actually meets code
- Where GFCI and AFCI protection is required
- How we get a metal building ready for your electrician
- Get a quote for a building ready for your electrician
- FAQ
- Sources
Your planning checklist before you call an electrician
Before anyone picks up a drill, a few decisions will shape the entire job. Nailing these down first saves you from re-trenching a yard or re-pulling a permit later.
- Size for the future, not just today: a welder, EV charger, or electric heater pushes most garages past a 60A subpanel, so plan for 100A even if you don’t need it yet.
- Pick your feeder route: Underground conduit installation avoids overhead clearance concerns but requires trenching, while an overhead feeder is faster to install but needs height clearance from the garage to the house.
- Choose a wiring method: conduit with THHN/THWN-2 conductors or metal-clad (MC) cable, both of which hold up against the physical wear a metal building can cause to unprotected cable.
- Plan your grounding electrodes: detached structures typically need their own ground rods, with neutral and ground kept apart at the subpanel.
- Get the permit first: inspections catch wiring mistakes before they become fire or shock hazards, and skipping this step can void your homeowner’s insurance.
Why Romex alone usually fails in a metal building
Standard NM-B cable, the yellow-jacketed Romex most homeowners know, is not built for exposed use against a conductive metal shell. It has no metal or rigid plastic armor, so a stray screw, a shifted panel, or routine wear can nick the insulation and create a short against the building itself. According to the planning guide at HomeGuide, exposed Romex in metal garages is generally not permitted or recommended because it lacks protection from physical damage and isn’t rated for the condensation that metal buildings are prone to.
That doesn’t mean Romex is banned everywhere inside a metal garage. Once it’s concealed inside a finished, insulated wall cavity, many local codes treat it the same as they would in a wood-framed house. The exposed runs along the ceiling or wall surface are where the trouble starts.
- Conduit with THHN/THWN-2 conductors: the standard for exposed runs in metal buildings. EMT (electrical metallic tubing) or rigid metal conduit (RMC) protects individual conductors and can double as part of the bonding path.
- MC (metal-clad) cable: a flexible, armored option that speeds up installation in tight spaces without sacrificing physical protection.
- Flexible metal conduit (FMC): useful for short connections to motors, fans, or equipment that vibrates, where rigid conduit would be impractical.
- Nonmetallic boxes: allowed in some cases, but only with listed fittings that maintain proper bonding continuity when the raceway itself is metal.
Pro Tip: Run conduit on the surface of interior walls rather than behind them. It keeps conductors off the metal shell and makes future changes, like adding an outlet for a new tool, a matter of opening a box instead of cutting into a wall.
Bonding the shell and grounding the subpanel correctly
Bonding and grounding solve two different problems, and mixing them up is one of the most common mistakes in metal garage wiring. Bonding connects metal parts, conduit, boxes, and the building’s own metal frame, so they share the same electrical potential and don’t become energized during a fault. Grounding gives that fault current a path back to the earth and, ultimately, back to the source.
Metal raceways often serve double duty as part of the grounding path, but only when every joint maintains real metal-to-metal contact. OSHA’s wiring standard requires that metal raceways and other noncurrent-carrying metal parts used as grounding conductors stay effectively bonded to boxes and enclosures, with continuity maintained throughout.
Detached structures like a standalone metal garage typically need their own grounding electrodes, usually a pair of driven ground rods connected to the subpanel’s ground bus. The neutral bus, by contrast, stays isolated from both the ground bus and the enclosure once you’re past the main panel.
- Painted threads break bonding: coating on conduit threads or box connections has to be removed at contact points, or the metal-to-metal path OSHA requires simply doesn’t exist.
- Bonding neutral at the subpanel is a frequent error: that connection belongs at the main panel only.
- Skipping the shell bond leaves the building ungrounded: the metal structure itself needs a bonding connection, not just the conduit running through it.
One structural detail matters more than most homeowners realize: a detached garage subpanel needs its own grounding electrode system, separate from the house’s, per NEC guidance summarized by NFPA.
Why 100 amps is the default for most garage subpanels
Sizing a subpanel is a load-first exercise: add up what you’ll actually run, then size up for what you might run in five years. A few outlets and overhead lights might squeak by on 60A, but the math changes fast once a welder, air compressor, electric heater, or EV charger enters the picture. That’s why most workshop installations land on a 100A subpanel rather than the bare minimum.
Wire gauge depends on both the amperage and the distance the feeder has to travel, since voltage drop increases with run length.
Aluminum feeders are a cheaper alternative for longer runs but need larger gauges than copper to carry the same load safely, and every detached garage feeder needs four conductors: two hots, a neutral, and an equipment ground, with neutral and ground kept separate at the subpanel.
The cost difference between a 60A and 100A rough-in is small compared to what it costs to trench, re-conduit, and re-pull a feeder later once you’ve outgrown the smaller panel.
Choosing conduit and enclosures that survive metal-building conditions
Metal garages trap condensation differently than wood-framed buildings, so the materials protecting your wiring need to handle moisture as much as physical wear. Galvanized EMT is the standard choice for most interior runs, holding up well against minor corrosion while staying affordable. PVC-coated conduit or rigid nonmetallic conduit steps in where humidity, fertilizer, or chemical exposure is a bigger concern, such as a garage doubling as a farm shop.
Enclosures matter just as much as the conduit feeding them. A damp-location or weatherproof-rated box, mounted with a slight gap from the metal wall rather than flush against it, avoids trapping moisture behind the device.
- Seal every penetration: use listed fittings where conduit passes through the metal shell to keep water from tracking in along the wire.
- Protect conductors at metal edges: a raw cut edge in a wall panel will see through insulation over time without a grommet or bushing.
- Match the enclosure to the location: an interior, climate-controlled corner can use standard boxes, while anything near a door or bay opening needs a damp-rated version.
Dealing with weak Wi-Fi and cell signal inside a metal shell
A continuous metal building acts something like a Faraday cage, and that’s not a minor annoyance if you’re trying to run a smart thermostat, security camera, or just stream music while you work. Solid metal walls and roofing attenuate Wi-Fi and cellular signals far more aggressively than wood framing or drywall ever would.
The fix almost always comes down to getting a wired signal into the building rather than fighting the walls with a stronger wireless signal. Running outdoor-rated Ethernet from the house to an interior access point, or feeding an exterior-mounted antenna with coax, both reliably outperform trying to boost a router’s range from outside.
- Wired backhaul wins: an Ethernet or coax run into the building feeding an interior access point is far more reliable than a repeater trying to punch through metal walls.
- Exterior antennas work for cellular: a roof- or wall-mounted antenna fed by coax can restore usable signal for a cell booster.
- Small, strategic cable entries matter: one properly sealed penetration for a data cable beats trying to compensate wirelessly after the fact.
Pro Tip: Keep RF planning separate from electrical bonding in your head. Bonding the shell protects against electrical faults; it does nothing for Wi-Fi reception, which needs its own wired or antenna-based solution.
Permits, inspections, and what to leave to a licensed electrician
Skipping the permit is one of the costliest shortcuts a homeowner can take. Unpermitted work can trigger an insurance denial after a fire or shock incident, and permit fees themselves are typically $50 to $200, a small price next to the risk of redoing the work later.
- Pull the permit before trenching or wiring begins, since most jurisdictions require it ahead of any buried conduit or new circuit.
- Dig the trench and lay conduit yourself if your local code allows it, which many do for the excavation and conduit-laying portion of the job.
- Hand off panel work, service connections, and meter work to a licensed electrician, since these carry the highest risk and are rarely permitted for DIY work.
- Schedule the inspection before closing up any trench or wall, so the inspector can verify bonding and grounding while it’s still visible.
Pro Tip: When vetting an electrician, ask directly whether they’ve wired a detached metal building before. Bonding a metal shell is different from a stick-framed garage, and an electrician who can describe how they’ll handle it is one you can trust with the rest of the job.
Heating and ventilation circuits need their own planning
Electric heaters and exhaust fans are often the biggest single loads in a metal garage, and they deserve their own dedicated circuits rather than sharing space with outlets and lighting. A 240-volt electric heater, common for garages used as workshops through cold months, typically needs its own breaker sized to the unit’s nameplate rating, not a general-purpose circuit shared with other equipment.
Ventilation fans, whether a simple exhaust fan or a powered intake vent, draw less current but still benefit from a dedicated circuit if they run continuously, since a tripped shared breaker can shut down ventilation at the worst time, like while running a vehicle engine or welding. Placement matters too: heaters mounted near metal walls or ceilings need enough clearance from combustible materials and stored items, even though the garage shell itself is noncombustible.
Moisture is the other factor heating and ventilation circuits have to account for. A heater or fan installed near a bay door or in a garage that sees snow and rain tracked in needs a damp-rated enclosure and properly sealed conduit entries, the same principles covered earlier for general wiring, but applied to equipment that often sits closer to the building’s exterior walls. Planning heater and fan circuits alongside your subpanel sizing, rather than as an afterthought, avoids discovering mid-project that your 60A panel has no headroom left for the heater you actually want.
Garage doors and openers carry their own electrical risks
A metal garage door and its opener introduce electrical considerations that a simple outlet or light fixture doesn’t. The opener itself needs a dedicated, properly grounded circuit, and because the door and track are metal, any fault in the opener’s wiring has a direct path to a large conductive surface that’s also next to the vehicle and anyone standing near it.
Bonding matters here just as much as it does for the building shell. The door track and any metal door panels should tie into the same bonding system as the rest of the structure, so a fault doesn’t leave the door itself energized. Openers installed near the door’s travel path also need wiring routed and secured well clear of moving parts, since a pinched or worn cable near a track is both a shock and a fire risk.
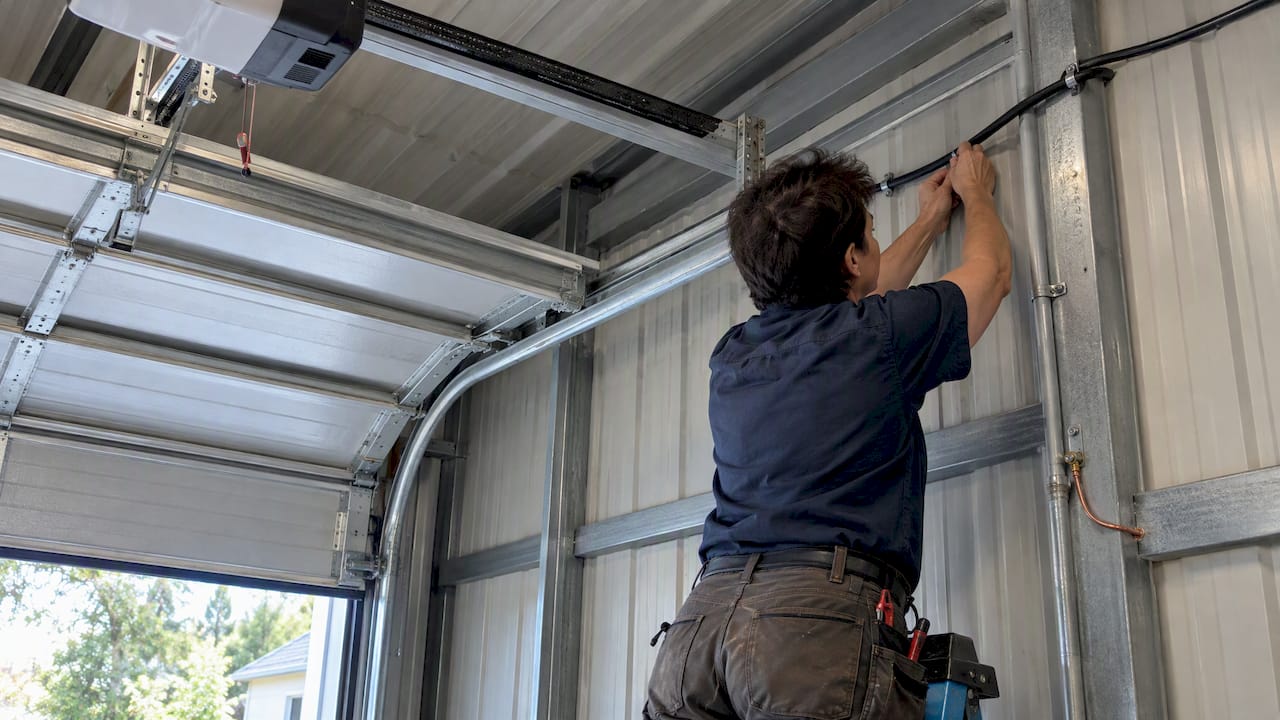
Weather exposure is the other piece. Garage door openers often sit near the top of a bay opening, an area more exposed to blown-in rain or snow than the rest of the interior, so the opener’s electrical connections and any nearby outlets benefit from damp-rated covers and proper sealing where conduit enters the housing. A GFCI-protected circuit for the opener, covered in more detail below, adds another layer of protection given how close the equipment sits to a large metal door people touch directly.
Outlet placement and spacing that actually meets code
Outlet spacing in a garage follows the same general logic as a house, but metal buildings add a few wrinkles worth planning for. Residential code generally calls for outlets spaced so that no point along a wall is more than six feet from one, which in a garage translates to outlets positioned every twelve feet or so along usable wall space.
Workbenches and tool areas deserve denser spacing than that baseline, since a workshop with a single outlet across a twenty-foot bench forces extension cords that defeat the purpose of hardwired circuits in the first place. Placing outlets at counter height along a workbench, rather than only at floor level, keeps cords shorter and tools easier to use.
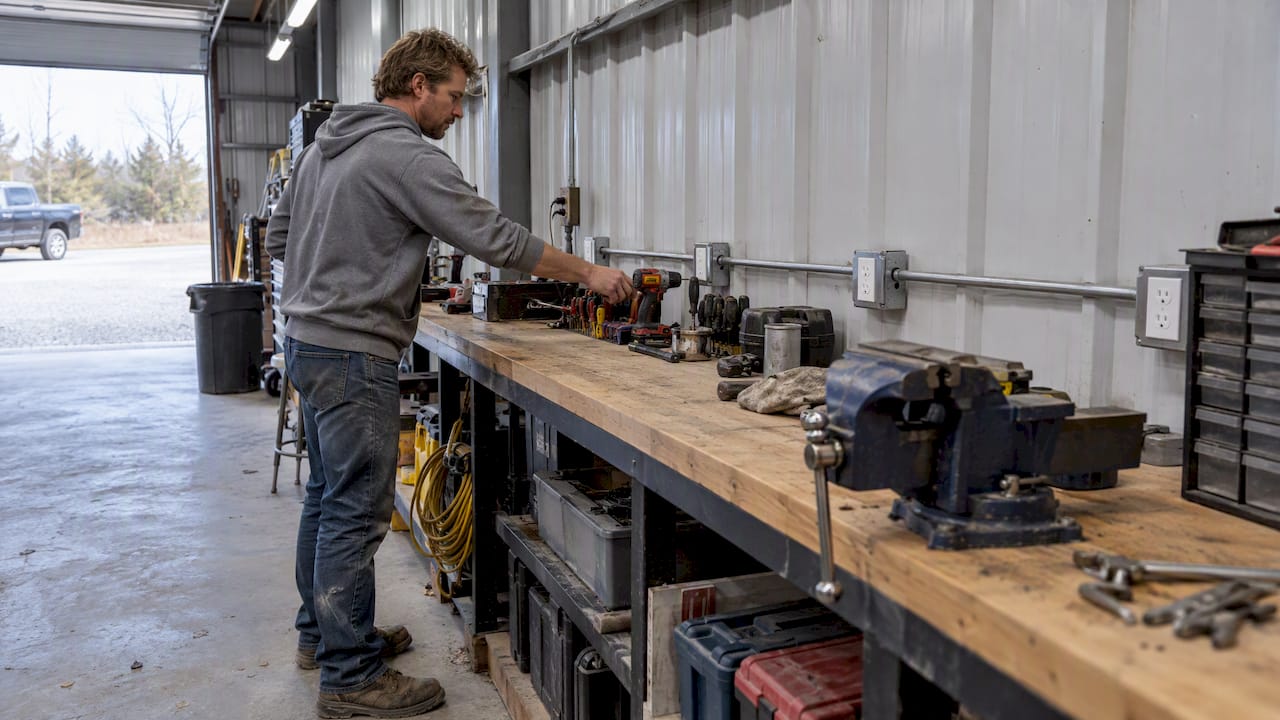
Garage-specific code requirements also call for at least one outlet dedicated to vehicle equipment, which matters if you’re planning for an EV charger or a block heater. Floor-level outlets near a garage door should sit high enough, or be positioned away from the door’s path, that they’re not exposed to water tracked in during wet weather. Combining outlet placement planning with your subpanel sizing conversation, discussed earlier, means you’re not retrofitting a workbench outlet after the walls are already closed up.
Where GFCI and AFCI protection is required
Garages are one of the locations residential code treats most strictly for GFCI protection, and metal garages are no exception. Nearly every 15- and 20-amp, 125-volt outlet in a garage needs GFCI protection, whether that comes from a GFCI breaker at the subpanel or individual GFCI outlets at each location. The reasoning is straightforward: garages see wet floors, metal tools, and power equipment used in conditions that make a ground fault far more dangerous than it would be in a dry living room.
AFCI protection, designed to catch arcing faults rather than ground faults, has a narrower footprint in most garage installations compared to living spaces, but some jurisdictions are extending AFCI requirements into garages as code cycles update, so checking current local amendments before wiring is worth the call to your permit office.
Dedicated circuits for equipment like a freezer or sump pump sometimes get GFCI protection with a design that avoids nuisance trips, since a freezer that keeps shutting off from a sensitive GFCI defeats its purpose. An electrician familiar with detached metal buildings will know how to balance that protection against the practical need for equipment to keep running, which is exactly the kind of judgment call that’s hard to get right without someone who has done it before.
How we get a metal building ready for your electrician
We build every garage, workshop, and barn with the electrical rough-in in mind, even though the final connections are always a licensed electrician’s job. That means planning conduit chase locations, foundation sleeves, and mounting points for panels or outlets before the walls ever go up, so your electrician isn’t drilling through finished panels to route a feeder. Site prep and foundation work are coordinated with the structure’s layout from day one.
— Stoots
Get a quote for a building ready for your electrician
We can design and build a garage, workshop, or barndominium shell with the chases, sleeves, and mounting points already planned, so your electrician’s job starts easier and finishes faster. From foundation to final walk-through, the structural side is ours; the panel, service, and meter connections still belong to a licensed electrician.

- Browse Garages & Workshops, Carports & RV Covers, and Barns & Ag Buildings to see the building types we offer.
- Review our Concrete & Foundations and Site Prep & Grading services if you need a slab or apron planned around conduit routing.
- Request a quote through our homepage to start a conversation about a turnkey, electrical-ready build.
FAQ
What are the disadvantages of a metal garage?
Metal garages can be more prone to condensation than wood-framed buildings, which matters for wiring protection and for insulation planning. They also attenuate Wi-Fi and cellular signals more than a typical house, since a continuous metal shell behaves similarly to a Faraday cage.
Can I run Romex in a metal building?
Exposed Romex (NM-B) is generally not recommended or permitted in metal garages because it lacks protection against physical damage and isn’t rated for the condensation common in metal buildings, according to HomeGuide’s planning guide. It may be acceptable once concealed inside a finished, insulated wall, depending on local code.
Does cable need to be in conduit in a garage?
For exposed runs along metal walls or ceilings, yes, conduit with THHN/THWN-2 conductors or metal-clad cable is the standard approach. Conduit protects conductors from physical damage and helps maintain the bonding continuity that OSHA’s wiring standard requires for metal raceways.
Can I run exposed Romex wire in my garage?
Running exposed Romex against an unprotected metal wall is generally not advisable, since the cable has no armor or conduit to guard against nicks, abrasion, or moisture. Conduit or metal-clad cable is the safer, code-compliant choice for any run that stays exposed rather than buried inside a finished wall.
What size subpanel should a metal garage have?
Most workshops are best served by a 100-amp subpanel, since it accommodates EV chargers, welders, and heaters without a costly upgrade later, according to guidance from The Garage Guide. A 60A panel can work for basic lighting and outlets but leaves little room to grow.
Sources
- How to Run Electricity to a Detached Garage: The Complete Planning Guide | HomeGuide
- How to Run Electricity to a Detached Garage: The Complete Planning Guide | The Garage Guide
- OSHA wiring regulations and metal raceway grounding (1910.305)
- Single family residential electrical services considerations (NFPA)
Leave a Reply